[Spring Security] OAuth2 실습 - 자체 로그인 구현
🐥 OAuth2 시리즈
OAuth2 실습 전에 자체로그인을 구현해보자.
회원가입은 간단해서 이 포스팅 설명에는 빠져있다. 깃허브 전체코드에서 참고하길 바란다.
🔐 자체 로그인 구현하기
⚙️ SecurityConfig 설정하기
SecurityConfig
1
2
3
4
5
6
7
8
9
10
11
12
13
14
15
16
17
18
@Configuration
@EnableWebSecurity
@RequiredArgsConstructor
public class SecurityConfig {

    @Bean
    public SecurityFilterChain securityFilterChain(HttpSecurity http) throws Exception {
        http
                .csrf(AbstractHttpConfigurer::disable)
                .authorizeHttpRequests(authorize -> authorize
                        .requestMatchers("/css/**", "/images/**", "/js/**", "/h2-console/**").permitAll()
                        .requestMatchers("/api/v1/auth/login", "/api/v1/auth/signup").permitAll()
                        .anyRequest().authenticated())
        ;
        return http.build();
    }

}
그리고 PasswordEncoder 빈을 정의할 AuthConfig도 생성해준다.
1
2
3
4
5
6
7
8
@Configuration
public class AuthConfig {
    @Bean
    public PasswordEncoder passwordEncoder() {
        return PasswordEncoderFactories.createDelegatingPasswordEncoder();
    }

}
🧩 인증 필터 구현하기
RestAuthenticationFilter
1
2
3
4
5
6
7
8
9
10
11
12
13
14
15
16
17
18
public class RestAuthenticationFilter extends AbstractAuthenticationProcessingFilter {
    private final ObjectMapper objectMapper = new ObjectMapper();
    public RestAuthenticationFilter() {
        super(new AntPathRequestMatcher("/api/v1/auth/login", "POST"));
    }

    @Override
    public Authentication attemptAuthentication(HttpServletRequest request, HttpServletResponse response) throws AuthenticationException, IOException, ServletException {
        LoginRequest loginRequest = objectMapper.readValue(request.getReader(), LoginRequest.class);

        if (!StringUtils.hasText(loginRequest.getEmail()) || !StringUtils.hasText(loginRequest.getPassword())) {
            throw new AuthenticationServiceException("email or Password not provided");
        }
        RestAuthenticationToken token = new RestAuthenticationToken(loginRequest.getEmail(),loginRequest.getPassword());

        return getAuthenticationManager().authenticate(token);
    }
}
AbstractAuthenticationProcessingFilter를 상속받아 만들어준다.
여기서 인증 아키텍처 흐름을 복습해보자.
필터에 전달된 사용자 정보를 통해 Authentication 객체를 생성하고 그 Authentication 객체는 AuthenticationManager에 전달된다.
AuthenticationManager는 다시 인증처리를 AuthenticationProvider에 위임한다.
인증이 성공할 경우 AuthenticationSuccessHandler가 호출되고 인증이 실패할 경우 AuthenticationFailureHandler가 호출된다.
우리는 이것들을 커스텀하게 구현해주면된다.
Authentication 객체인 RestAuthenticationToken을 구현해주자.
1
2
3
4
5
6
7
8
9
10
11
12
13
14
15
16
17
18
19
20
21
22
23
24
25
26
27
28
29
public class RestAuthenticationToken extends AbstractAuthenticationToken {

    private final Object principal;
    private final Object credentials;

    public RestAuthenticationToken(Object principal, Object credentials) {
        super(null);
        this.principal = principal;
        this.credentials = credentials;
        setAuthenticated(false);
    }

    public RestAuthenticationToken(Collection<? extends GrantedAuthority> authorities, Object principal, Object credentials) {
        super(authorities);
        this.principal = principal;
        this.credentials = credentials;
        super.setAuthenticated(true);
    }

    @Override
    public Object getCredentials() {
        return this.credentials;
    }

    @Override
    public Object getPrincipal() {
        return this.principal;
    }
}
이제 다음으로는 AuthenticationManager를 설정해주고 커스텀 필터를 시큐리티 필터체인에 추가해주자.
SecurityConfig
1
2
3
4
5
6
7
8
9
10
11
12
13
14
15
16
17
18
19
20
21
22
23
24
25
26
27
28
29
30
31
@Configuration
@EnableWebSecurity
@RequiredArgsConstructor
public class SecurityConfig {

    @Bean
    public SecurityFilterChain securityFilterChain(HttpSecurity http) throws Exception {
        AuthenticationManagerBuilder authenticationManagerBuilder = http.getSharedObject(AuthenticationManagerBuilder.class);
        AuthenticationManager authenticationManager = authenticationManagerBuilder.build();            // build() 는 최초 한번 만 호출해야 한다

        http
                .csrf(AbstractHttpConfigurer::disable)
                .authorizeHttpRequests(authorize -> authorize
                        .requestMatchers("/css/**", "/images/**", "/js/**", "/h2-console/**").permitAll()
                        .requestMatchers("/api/v1/auth/login", "/api/v1/auth/signup").permitAll()
                        .anyRequest().authenticated())
                .addFilterBefore(restAuthenticationFilter(authenticationManager), UsernamePasswordAuthenticationFilter.class)
                .authenticationManager(authenticationManager)
        ;
        return http.build();
    }

    private RestAuthenticationFilter restAuthenticationFilter(AuthenticationManager authenticationManager) {

        RestAuthenticationFilter restAuthenticationFilter = new RestAuthenticationFilter();
        restAuthenticationFilter.setAuthenticationManager(authenticationManager);

        return restAuthenticationFilter;
    }

}
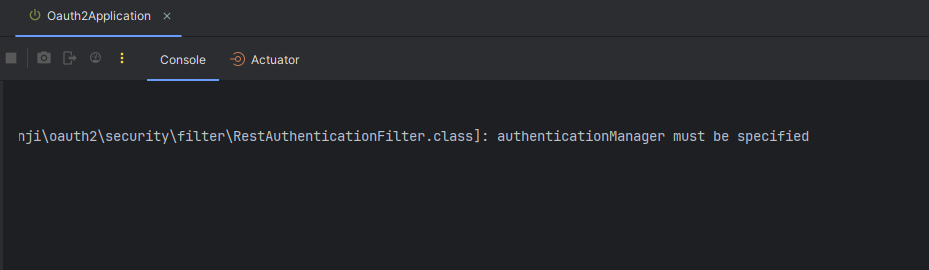
🚨 참고
1
java.lang.NullPointerException: Cannot invoke "org.springframework.security.authentication.AuthenticationManager.authenticate(org.springframework.security.core.Authentication)" because the return value of "com.yoonji.oauth2.security.filter.RestAuthenticationFilter.getAuthenticationManager()" is null
AuthenticationManager를 특정해주지 않으면 에러가 난다.
이부분에 대해서는 심도있는 분석이 필요할 것 같다.
내가 처음 스프링 시큐리티를 공부했던 강의의 질문에서는 HttpSecurity에 AuthenticationManager 설정을 해주지 않으면 AuthenticaionManager 생성을 중복으로 하기 때문에 이미 생성한 AuthenticationManager를 설정해줘야 한다라고 한다.
🗝️ AuthenticationProvider 구현하기
1
2
3
4
5
6
7
8
9
10
11
12
13
14
15
16
17
18
19
20
21
22
23
24
25
26
27
28
29
30
31
32
33
34
35
36
37
38
39
40
package com.yoonji.oauth2.security.provider;

import com.yoonji.oauth2.security.service.CustomUserDetails;
import com.yoonji.oauth2.security.service.CustomUserDetailsService;
import com.yoonji.oauth2.security.token.RestAuthenticationToken;
import lombok.RequiredArgsConstructor;
import org.springframework.security.authentication.AuthenticationProvider;
import org.springframework.security.authentication.BadCredentialsException;
import org.springframework.security.authentication.UsernamePasswordAuthenticationToken;
import org.springframework.security.core.Authentication;
import org.springframework.security.core.AuthenticationException;
import org.springframework.security.crypto.password.PasswordEncoder;
import org.springframework.stereotype.Component;

@Component
@RequiredArgsConstructor
public class RestAuthenticationProvider implements AuthenticationProvider {

    private final CustomUserDetailsService customUserDetailsService;
    private final PasswordEncoder passwordEncoder;

    @Override
    public Authentication authenticate(Authentication authentication) throws AuthenticationException {
        String loginId = authentication.getName();
        String password = (String) authentication.getCredentials();
        CustomUserDetails customUserDetails = (CustomUserDetails) customUserDetailsService.loadUserByUsername(loginId);

        if(!passwordEncoder.matches(password, customUserDetails.getPassword())){
            throw new BadCredentialsException("Invalid password");
        }

        return new RestAuthenticationToken(customUserDetails.getAuthorities(), customUserDetails, null);
    }

    @Override
    public boolean supports(Class<?> authentication) {
        return authentication.isAssignableFrom(RestAuthenticationToken.class);
    }
}
CustomUserDetailsService
1
2
3
4
5
6
7
8
9
10
11
12
13
14
@Service
@RequiredArgsConstructor
public class CustomUserDetailsService implements UserDetailsService {

    private final UserRepository userRepository;

    @Override
    public UserDetails loadUserByUsername(String username) throws UsernameNotFoundException {
        User user = userRepository.findByEmail(username)
                .orElseThrow(() -> new UsernameNotFoundException("User not found with email: " + username));

        return new CustomUserDetails(user);
    }
}
CustomUserDetails
1
2
3
4
5
6
7
8
9
10
11
12
13
14
15
16
17
18
19
20
21
22
23
24
25
26
27
28
29
30
31
32
33
34
35
36
37
38
39
40
41
42
43
44
@Getter
public class CustomUserDetails implements UserDetails {

    private final User user;

    public CustomUserDetails(User user) {
        this.user = user;
    }

    @Override
    public Collection<? extends GrantedAuthority> getAuthorities() {
        return Collections.singletonList(new SimpleGrantedAuthority(user.getRole().name()));
    }

    @Override
    public String getPassword() {
        return user.getPassword();
    }

    @Override
    public String getUsername() {
        return user.getEmail();
    }

    @Override
    public boolean isAccountNonExpired() {
        return true;
    }

    @Override
    public boolean isAccountNonLocked() {
        return true;
    }

    @Override
    public boolean isCredentialsNonExpired() {
        return true;
    }

    @Override
    public boolean isEnabled() {
        return true;
    }
}
만든 AuthenticationProvider를 SpringSecurity에 설정해주자.
1
2
3
4
5
6
7
8
9
10
11
12
private final RestAuthenticationProvider restAuthenticationProvider;

@Bean
public SecurityFilterChain securityFilterChain(HttpSecurity http) throws Exception {
    AuthenticationManagerBuilder authenticationManagerBuilder = http.getSharedObject(AuthenticationManagerBuilder.class);
    authenticationManagerBuilder.authenticationProvider(restAuthenticationProvider);
    AuthenticationManager authenticationManager = authenticationManagerBuilder.build();            // build() 는 최초 한번 만 호출해야 한다

    // ...

    return http.build();
}
AuthenticationManagerBuilder에 커스텀 AuthenticationProvider를 설정해주면 된다.
🎭 인증 성공 & 실패 핸들러 구현하기
RestAuthenticationSuccessHandler
1
2
3
4
5
6
7
8
9
10
11
12
13
14
15
16
17
18
19
20
21
22
23
24
25
26
27
@Component
public class RestAuthenticationSuccessHandler implements AuthenticationSuccessHandler {
    @Override
    public void onAuthenticationSuccess(HttpServletRequest request, HttpServletResponse response, Authentication authentication) throws IOException {

        ObjectMapper mapper = new ObjectMapper();

        CustomUserDetails userDetails = (CustomUserDetails) authentication.getPrincipal();
        response.setStatus(HttpStatus.OK.value());
        response.setContentType(MediaType.APPLICATION_JSON_VALUE);
        response.setCharacterEncoding("UTF-8");
        mapper.writeValue(response.getWriter(), UserResponse.builder()
                .nickname(userDetails.getUser().getNickname())
                .email(userDetails.getUser().getEmail())
                .role(userDetails.getUser().getRole().name())
                .build());

        clearAuthenticationAttributes(request);
    }
    protected final void clearAuthenticationAttributes(HttpServletRequest request) {
        HttpSession session = request.getSession(false);
        if (session == null) {
            return;
        }
        session.removeAttribute(WebAttributes.AUTHENTICATION_EXCEPTION);
    }
}
RestAuthenticationFailureHandler
1
2
3
4
5
6
7
8
9
10
11
12
13
14
15
16
17
@Component
public class RestAuthenticationFailureHandler implements AuthenticationFailureHandler {
    @Override
    public void onAuthenticationFailure(HttpServletRequest request, HttpServletResponse response, AuthenticationException exception) throws IOException, ServletException {
        ObjectMapper mapper = new ObjectMapper();

        response.setStatus(HttpStatus.UNAUTHORIZED.value());
        response.setContentType(MediaType.APPLICATION_JSON_VALUE);
        response.setCharacterEncoding("UTF-8");

        if (exception instanceof BadCredentialsException) {
            mapper.writeValue(response.getWriter(), "Invalid username or password");

        }
        mapper.writeValue(response.getWriter(), "Authentication failed");
    }
}
SecurityConfig에 설정해주자.
1
2
3
4
5
6
7
8
9
10
11
12
13
14
15
16
17
public class SecurityConfig {

    private final RestAuthenticationSuccessHandler restAuthenticationSuccessHandler;
    private final RestAuthenticationFailureHandler restAuthenticationFailureHandler;


    private RestAuthenticationFilter restAuthenticationFilter(AuthenticationManager authenticationManager) {

        RestAuthenticationFilter restAuthenticationFilter = new RestAuthenticationFilter();
        restAuthenticationFilter.setAuthenticationManager(authenticationManager);
        restAuthenticationFilter.setAuthenticationSuccessHandler(restAuthenticationSuccessHandler);
        restAuthenticationFilter.setAuthenticationFailureHandler(restAuthenticationFailureHandler);

        return restAuthenticationFilter;
    }

}
이렇게 하면 자체 로그인 기능이 완료되었다.
💾 인증 상태 영속하기
인증이 성공하면 `Authentication` 객체가 `SecurityContextHolder`에 설정(저장)된다. 향후 요청에서도 계속 사용자의 인증을 유지하고 싶으면 `SecurityContextRepository#saveContext`를 명시적으로 호출해야한다.
우리는 커스텀 필터 RestAuthenticationFilter를 만들었다. 이 필터는 AbstractAuthenticationProcessingFilter를 상속받는다. SecurityContextHolder에 Authentication 객체를 설정해주는 작업은 AbstractAuthenticationProcessingFilter에서 해준다. (successfulAuthentication에서 해준다.)
하지만 해당 필터는 인증 상태를 영속해주는 SecurityContextRepository가 기본으로 RequestAttributeSecurityContextRepository로 설정되어 있다 단일 요청 내에서만 SecurityContext가 유효한 것이다.
따라서 DelegatingSecurityContextRepository를 사용하여 HttpSessionSecurityConextRepository에도 위임하도록 해주어야 한다.
RestAuthenticationFilter 코드를 변경해주자.
1
2
3
4
5
6
7
8
9
10
11
12
13
14
15
16
17
18
19
20
21
22
23
24
25
26
27
28
public class RestAuthenticationFilter extends AbstractAuthenticationProcessingFilter {
    private final ObjectMapper objectMapper = new ObjectMapper();
    public RestAuthenticationFilter(HttpSecurity http) {
        super(new AntPathRequestMatcher("/api/v1/auth/login", "POST"));
        setSecurityContextRepository(getSecurityContextRepository(http));
    }

    private SecurityContextRepository getSecurityContextRepository(HttpSecurity http) {
        SecurityContextRepository securityContextRepository = http.getSharedObject(SecurityContextRepository.class);
        if (securityContextRepository == null) {
            securityContextRepository = new DelegatingSecurityContextRepository(
                    new RequestAttributeSecurityContextRepository(), new HttpSessionSecurityContextRepository());
        }
        return securityContextRepository;
    }

    @Override
    public Authentication attemptAuthentication(HttpServletRequest request, HttpServletResponse response) throws AuthenticationException, IOException, ServletException {
        LoginRequest loginRequest = objectMapper.readValue(request.getReader(), LoginRequest.class);

        if (!StringUtils.hasText(loginRequest.getEmail()) || !StringUtils.hasText(loginRequest.getPassword())) {
            throw new AuthenticationServiceException("email or Password not provided");
        }
        RestAuthenticationToken token = new RestAuthenticationToken(loginRequest.getEmail(),loginRequest.getPassword());

        return getAuthenticationManager().authenticate(token);
    }
}
SecurityConfig도 코드를 이것에 맞춰 살짝 바꿔주자.
1
2
3
4
5
6
7
8
9
10
11
12
13
14
15
16
17
18
19
20
21
22
23
24
25
@Bean
public SecurityFilterChain securityFilterChain(HttpSecurity http) throws Exception {
    AuthenticationManagerBuilder authenticationManagerBuilder = http.getSharedObject(AuthenticationManagerBuilder.class);
    authenticationManagerBuilder.authenticationProvider(restAuthenticationProvider);
    AuthenticationManager authenticationManager = authenticationManagerBuilder.build();            // build() 는 최초 한번 만 호출해야 한다

    http
            .csrf(AbstractHttpConfigurer::disable)
            //...
            .addFilterBefore(restAuthenticationFilter(http, authenticationManager), UsernamePasswordAuthenticationFilter.class)
            .authenticationManager(authenticationManager)

    ;
    return http.build();
}

private RestAuthenticationFilter restAuthenticationFilter(HttpSecurity http, AuthenticationManager authenticationManager) {

    RestAuthenticationFilter restAuthenticationFilter = new RestAuthenticationFilter(http);
    restAuthenticationFilter.setAuthenticationManager(authenticationManager);
    restAuthenticationFilter.setAuthenticationSuccessHandler(restAuthenticationSuccessHandler);
    restAuthenticationFilter.setAuthenticationFailureHandler(restAuthenticationFailureHandler);

    return restAuthenticationFilter;
}
이렇게 하면 새로운 요청에 대해서도 인증이 유지가 된다.
🚦 예외 처리하기
예외처리 포스팅에서도 설명했지만,
AuthenticationEntryPoint는 인증되지 않은 상태에서 접근 거부 하는 것이고 AccessDeniedHandler는 인증된 상태에서 접근 거부하는 것이다.
SecurityConfig에 코드를 추가해주자.
1
2
3
4
5
6
7
8
9
10
11
12
13
14
@Bean
    public SecurityFilterChain securityFilterChain(HttpSecurity http) throws Exception {

        http
                .csrf(AbstractHttpConfigurer::disable)
                .addFilterBefore(restAuthenticationFilter(http, authenticationManager), UsernamePasswordAuthenticationFilter.class)
                .authenticationManager(authenticationManager)
                .exceptionHandling(exception -> exception
                        .authenticationEntryPoint(new RestAuthenticationEntryPoint())
                        .accessDeniedHandler(new RestAccessDeniedHandler())
                ) // 추가 된 코드
        ;
        return http.build();
    }
RestAuthenticationEntryPoint
1
2
3
4
5
6
7
8
9
10
public class RestAuthenticationEntryPoint implements AuthenticationEntryPoint {
    private final ObjectMapper mapper = new ObjectMapper();

    @Override
    public void commence(HttpServletRequest request, HttpServletResponse response, AuthenticationException authException) throws IOException, ServletException {
        response.setContentType(MediaType.APPLICATION_JSON_VALUE);
        response.setStatus(HttpStatus.UNAUTHORIZED.value());
        response.getWriter().write(mapper.writeValueAsString(HttpServletResponse.SC_UNAUTHORIZED));
    }
}
RestAccessDeniedHandler
1
2
3
4
5
6
7
8
9
10
11
public class RestAccessDeniedHandler implements AccessDeniedHandler {
    private final ObjectMapper mapper = new ObjectMapper();
    @Override
    public void handle(HttpServletRequest request, HttpServletResponse response, AccessDeniedException accessDeniedException) throws IOException {

        response.setContentType(MediaType.APPLICATION_JSON_VALUE);
        response.setStatus(HttpStatus.FORBIDDEN.value());
        response.getWriter().write(this.mapper.writeValueAsString(HttpServletResponse.SC_FORBIDDEN));

    }
}
🚪 로그아웃 구현하기
컨트롤러에 로그아웃 api 를 작성해주자
세션을 무효화 해주는 작업을 해준다.
1
2
3
4
5
6
7
8
@PostMapping(value = "/logout")
public String logout(HttpServletRequest request, HttpServletResponse response) {
    Authentication authentication = SecurityContextHolder.getContextHolderStrategy().getContext().getAuthentication();
    if (authentication != null) {
        new SecurityContextLogoutHandler().logout(request, response, authentication);
    }
    return "logout";
}
Leave a comment